Understanding Tubular Motors: The Foundation of a Clean, Hidden Design
What is a tubular motor and how does it enable hidden installations?
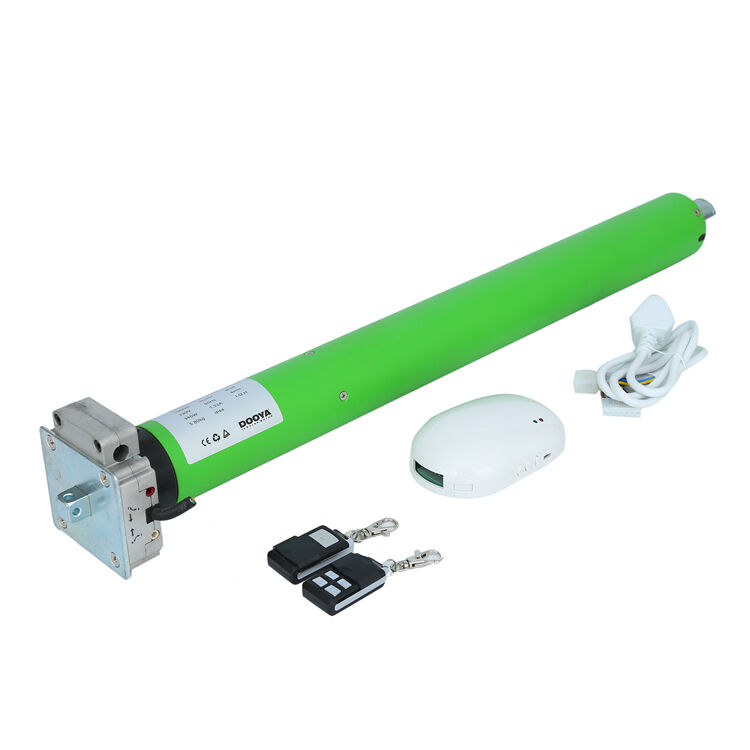
Tubular motors come as small cylinder shaped devices made specifically to fit into those hollow tubes found in automated shade systems. Most models have a diameter somewhere between about 1.5 to 2.5 inches, which allows them to hide completely inside things like curtain rods, blinds, or roller tubes without needing any extra parts sticking out. What makes these motors special is how they work from the inside out, sending power through a central shaft while keeping everything looking neat and tidy. This design really works well in contemporary spaces where people prefer not seeing mechanical bits and pieces everywhere.
Advantages of tubular motors: space-saving and quiet operation
Tubular motors operate at noise levels 25 dB—quieter than a whisper—making them ideal for bedrooms, home theaters, and offices. Their integrated design preserves wall and ceiling space, requiring up to 90% less clearance than traditional motorized systems. Key benefits include:
- 360° mounting flexibility, enabling installation in tight or unconventional spaces
- Automatic torque adjustment (up to 20 Nm) for smooth, consistent fabric movement
- IP44-rated models suitable for humid environments like bathrooms and sunrooms
Common applications in curtains, blinds, and shading systems
Over 68% of motorized shading installations now use tubular motors due to their discreet performance and versatility. They are commonly found in:
- Top-down/bottom-up cellular shades for layered light control
- Dual roller blind systems combining blackout and sunscreen fabrics
- Exterior solar screens engineered to withstand winds up to 60 mph
- Theater-grade drapery systems requiring precise, silent operation
Pre-Installation Planning: Choosing the Right Tubular Motor for Your Application
Key Selection Criteria: Power, Torque, Compatibility, and Environment
When picking out a tubular motor, start by looking at the power supply options which are usually either 24V DC or 230V AC. Torque output matters too, measured in Newton meters (Nm). Most residential setups will need around 6 Nm for blinds that weigh about 22 pounds. But if we're talking about bigger commercial jobs, then something closer to 15 Nm might be necessary. Make sure the voltage matches what the smart home hub requires, and check whether it supports the control method preferred by the installer, whether that's RF, Zigbee, or good old Wi-Fi. The environment where these motors operate makes a big difference as well. Standard IP20 rated models are fine inside buildings, but when installing outside or in damp locations like near swimming pools, go for IP65 rated units instead. These come with extra features like thermal overload protection and fully sealed parts to withstand harsh weather conditions without failing.
Matching Motor Size to Roller Blind Tube Dimensions and Type
Getting the right motor size is critical when working with roller tubes. The motor needs to fit inside the tube's inner diameter, which typically comes in standard sizes like 35mm, 45mm, or 59mm. It also matters whether the motor works well with the tube's overall length and what kind of material it's made from. Going too small can lead to all sorts of problems with slippage during operation. On the flip side, going too big puts unnecessary stress on mounting brackets and makes installation a real headache for technicians. When dealing with spring tensioned tubes, most experts suggest using those lightweight 1.5 inch motors. For heavier duty applications where metal tubes are involved, 2.3 inch motors with extra strong crown gears tend to perform better over time. A few companies actually make adjustable end caps that handle small differences in tube length, usually around plus or minus 5mm. This little feature can save hours of work when doing retrofit jobs on existing systems.
Indoor vs. Outdoor Considerations: Waterproofing and Dust Resistance
When setting up equipment outdoors, it's important to go for motors that have sealed bearings, housings that resist corrosion, and meet ISO 9227 standards for salt spray protection, particularly if the location is near the coast. Motors designed for water resistance tend to hold up about three times better in places where humidity is high compared to regular models. Dusty conditions present another challenge. Magnetic encoder positioning works much better than optical sensors in these situations because dust tends to gum up optical components over time. Thermal protection matters too. Look for motors certified by UL or CE standards with built in temperature safeguards. These features help maintain performance even when temperatures swing wildly from hot days to cold nights.
Tube Preparation and Component Assembly for a Seamless Fit
How to Measure and Cut the Roller Blind Tube Accurately
Start with measuring how wide the window recess is, then take off around 5 to 10 mm (that's roughly 0.2 to 0.4 inches) so there's room for the thing to rotate freely without getting stuck. A good old fashioned fine tooth hacksaw works just fine here, though some folks prefer a tube cutter for cleaner results. When dealing with those square or hexagonal shapes that need to be hidden away somewhere, laser cutting becomes pretty much essential. The machines can get down to within plus or minus 0.1 mm accuracy which means everything lines up properly when it comes time to put things together. Most DIYers won't need this level of precision unless they're working on something really intricate.
Preparing the Tube for Smooth Motor Insertion
Once the cutting is done, take care of those rough interior edges with either a rotary tool or some good quality sandpaper. Leftover burrs can really get in the way when trying to fit the motor into place. When working with brushed DC motors specifically, it helps to apply just a bit of silicone lubricant along the inside of the tube. This makes things run smoother during operation. And don't forget to check if the motor's crown gear is facing the right direction before mounting. Getting this wrong seems to be behind almost 25% of problems seen in automated shading systems according to field reports from technicians who deal with these installations regularly.
Aligning Brackets and End Caps for a Flush, Invisible Finish
The brackets should go about 80 to 100 mm away from both ends of the tube. Take advantage of those built-in wire channels so all those pesky cables can run out of sight. For longer installations over 3 meters (roughly 9.8 feet), don't forget that middle support bracket. Without it, things tend to sag down the road which nobody wants to deal with later. When putting on those end caps, go easy with the rubber mallet and spread them out evenly across the surface. Too much force here can warp everything. Before actually securing everything in place, give the whole assembly a gentle spin by hand. If everything is properly aligned, it should move smoothly without any noise at all. Premium quality motors typically operate below 25 dB, so if there's even a whisper of resistance or sound during testing, something probably needs adjusting.
Step-by-Step Tubular Motor Installation for Minimal Visibility
Securely Installing the Crown Gear and Drive Shaft
Getting the crown gear aligned correctly with the motor shaft is really important, and we need to make sure there's absolutely no side to side movement. Industry guidelines from the 2023 Shading Systems Report recommend tightening it down to between 15 and 20 Newton meters of torque. This range keeps things secure enough so the gear doesn't slip around but still protects against putting too much stress on the components. A good trick is to grab a laser level for checking the alignment. Believe it or not, something as small as one degree off can cause all sorts of problems later on. We've seen cases where even minor misalignment leads to fabric that rolls unevenly or creates annoying gaps when everything is running.
Inserting the Motor into the Tube Without Damage
- Apply a silicone-based lubricant to the tube’s interior
- Use a motor insertion guide, ensuring 0.5–1mm clearance for tubes with 70–100mm ID
- Rotate the motor clockwise while inserting to smoothly engage helical gears
Best Practices for Motor and Tube Integration
| Consideration | Ideal Parameter | Risk if Ignored |
|---|---|---|
| End-cap spacing | 4–6mm from bracket | Motor jamming (37% failure) |
| Power cable routing | 180° loop behind tube | Visible protrusions |
| Torque calibration | 80% of motor max capacity | Premature wear |
Fitting Motorized Tubular Systems with Near-Invisible Results
Mounting brackets can be hidden inside pelmets or window frames when using specially made aluminum sleeves. When installing on ceilings, create recessed pockets with magnetic covers that keep hardware out of sight. According to a study published in Architectural Digest last year, this approach cuts down on visual clutter by almost 90% in small apartments and studios. Before finishing up, check how the fabric behaves in different wind conditions so it wraps snugly around the tube without leaving any gaps that might give away the presence of motors behind the scenes.
Final Integration: Concealing Wiring and Perfecting the Invisible Look
The final integration phase determines whether your motorized shading system achieves a truly seamless appearance. Strategic component management ensures the technology remains functional yet invisible.
Hiding Wiring Using Integrated Channels or Discreet Raceways
Whenever possible, run power and control cables through wall cavities, along crown molding, or within other architectural features already present in the space. When dealing with retrofit jobs, low profile raceways work well if painted to match surrounding walls or trim pieces. Some roller blind systems actually include built-in snap in cable channels these days. They hide all those wires inside the tube itself but still leave room to get at them later when maintenance becomes necessary or when upgrading components down the road.
Achieving Flush Mounting With Ceiling or Window Frame
Getting those mounting brackets aligned right takes more than guesswork these days. A good laser level makes all the difference in lining them up with structural supports so there are no ugly gaps showing through. Ceiling installations call for something special though. Go with those super slim brackets less than half an inch thick and don't forget the filler stuff between surfaces it really helps everything flow together smoothly. And when working around window frames? Custom milled end caps aren't just decorative fluff they actually blend in with whatever finish the frame already has, making everything look like it was part of the original design instead of an afterthought.
Calibrating Position Limits, Winding Direction, and Remote Pairing
When setting up travel limits, it's best to make small adjustments around 10 to 15 rotations at a time. This helps prevent stretching out the fabric too much which can cause damage over time. The winding direction really matters too depending on where the blinds sit compared to sunlight coming through windows. For instance, east facing windows need different settings than west ones. Many newer tubular motors come equipped with features that find remote controls automatically when they're within about 15 feet away. This makes installation easier since these motors work well with hidden control panels behind walls or even connect to smart home systems without needing visible buttons everywhere.
FAQ
What are tubular motors commonly used for?
Tubular motors are commonly used in motorized shading systems due to their discreet performance and versatility, including applications like top-down/bottom-up cellular shades, dual roller blind systems, exterior solar screens, and theater-grade drapery systems.
Can tubular motors be used in outdoor settings?
Yes, tubular motors can be used in outdoor settings, but it's important to choose models with features like sealed bearings and housings that resist corrosion to withstand harsh weather conditions.
How do tubular motors operate quietly?
Tubular motors operate quietly, often at noise levels quieter than 25 dB, due to their integrated design and smooth torque adjustment, making them ideal for noise-sensitive environments.
Table of Contents
- Understanding Tubular Motors: The Foundation of a Clean, Hidden Design
- Pre-Installation Planning: Choosing the Right Tubular Motor for Your Application
- Tube Preparation and Component Assembly for a Seamless Fit
- Step-by-Step Tubular Motor Installation for Minimal Visibility
- Final Integration: Concealing Wiring and Perfecting the Invisible Look
- FAQ